
If you play any tabletop miniature games set in towns or cities you probably have everything you need to play Heretic, my upcoming miniatures game already. The game can be played with any miniatures and any urban terrain, but there is one more specific requirement: you’ll need a monument. Now again, you likely already have something that fits the bill. Statues, obelisks, standing stones, or any number of other pieces work perfectly well as long as they have a footprint of roughly 2″x2″.
However, for those that don’t already have such a piece, or want to create something especially themed for the game I present this guide. Here’s how I built my own little shrine to authority, ready to be plastered over with revolutionary posters.
The Base
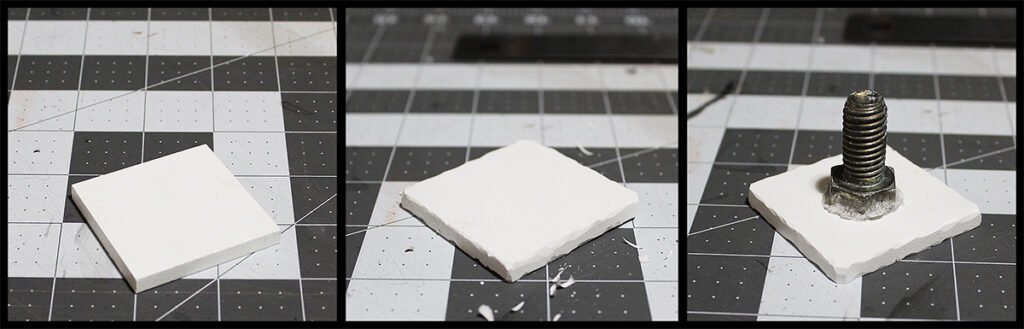
To start off with, I decided to use some scrap 6mm EPVC as a basing material. For those unfamiliar, EPVC is a foamed, light but fairly sturdy cousin to the white PVC pipes that make up so much household plumbing. It’s a cheap material that can easily be cut with a hobby knife, sanded, and drilled. It also holds up pretty well to getting bumped around.
I cut a 2″ square out of EPVC and used my hobby knife to chip the edges, imitating roughly carved stone. I used superglue and baking soda to attach a fat steel bolt to my base, giving it plenty of weight. If players are going to be sticking posters to this terrain piece, I don’t want it shifting around easily.
To build up the sides of my base, I cut four more pieces of EPVC at 1.5″ wide and attached them with super glue with butted corners. Note that although EPVC is a plastic, plastic cement does not bond it.
I used another 2″x2″ piece of EPVC to cap the base off, carving it again with my knife to give it a stone-like appearance.

To texture the sides of the base, I used one of my favorite materials: dollar store foamcore. The Readi-board brand of foamcore is available at Dollar Tree here in the US, and the paper on the front and back peels off extremely easily. This makes it a truly sad excuse for foamcore for almost any other purpose, but it’s great news for us!
Not only is this a simple way to get thin sheets of XPS foam to craft with, this foam is particularly low-density, so it takes texturing extremely well. Most XPS foam sold in the states is very dense and hard to leave good impressions on compared to XPS commonly available in Europe, but this particular product is marvelous for texture work.
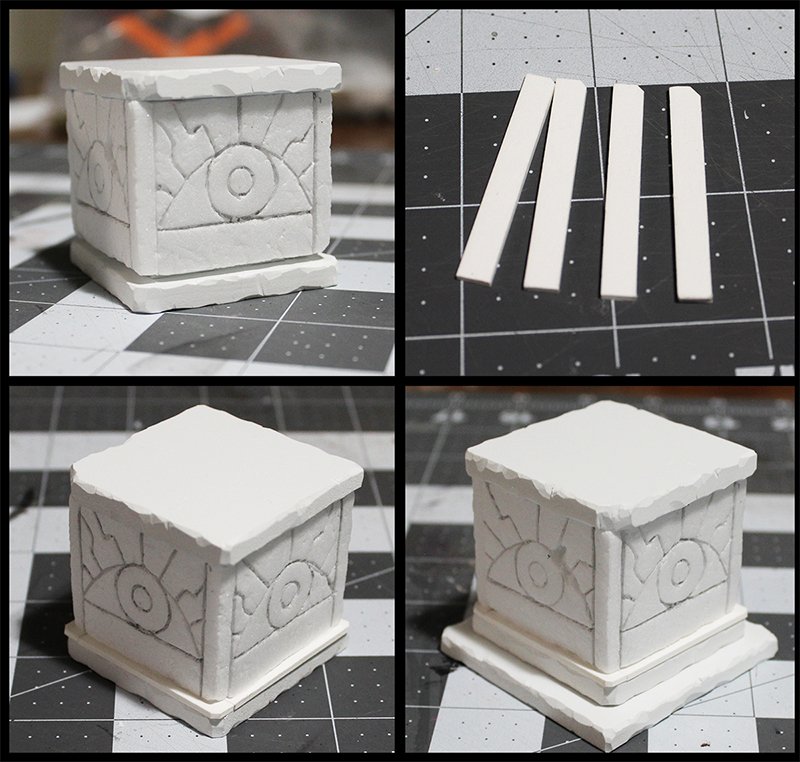
I peeled off the paper lining from a large piece of foamboard, then cut out four rectangles. These were the height of my base walls and the width of the base walls plus the thickness of the foamcore itself. This would allow me to clad the outside of the base without any awkward corners.
Next I used a ruler and a sharp pencil to gently scribe a line on the edge of each rectangle. When these are butted together around the base, they’ll have a seam near the edge of each face. By scribing this line, the seam will appear to be on both sides and therefore be symmetrical.
Using a washer and the same sharp pencil I scribed concentric circles in the center of each rectangle, then completed the design with some freehand scribing for an all-seeing eye motif. The watchful Authority never sleeps!

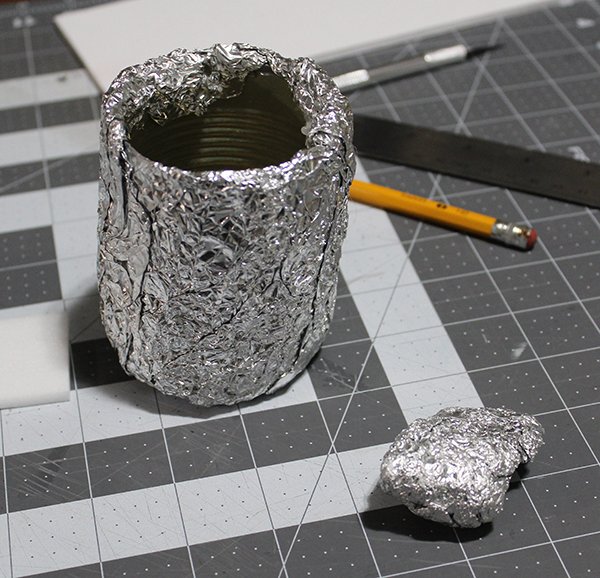
The final step for these pieces before attaching them was quickly texturing them with my high-tech texture roller… an old can of beans covered in tinfoil.
Once the sides were glued on I noticed to my dismay that I’d cut them about 1/16″ too short. No problem! I cut some thin strips of matboard that was about the same thickness (I could have also easily used chipboard, but the matboard is easier to cut) and nipped off one corner of each. These were glued into the gap with tacky PVA glue. These will get painted up to look like an iron band around my stone base later on.
Looking at the finished base, I decided I wanted it to look a bit more impressive. I cut a 2.5″x2.5″ piece of EPVC and glued it to the bottom to raise it up a little and increase its footprint. Hey, the rules say about 2″x2″! Anyway this small step up won’t block line of sight anyway, and it will add stability on the tabletop.
The Symbol
It was time to decide what to put on top of my monument.
I experimented with a few ideas. It would be very easy and effective to glue a miniature on top, especially one in a larger scale like 54mm or 72mm, but I didn’t have any that fit the theme of my other terrain. I wanted something that represented the concept of authority, and did so in an especially toxic way.
I settled on a stylized Alpha. The symbol of a toxic ideal of masculinity. Nowhere is this more realized than the fantastical demigod of justice that is a 2000AD-style supercop.
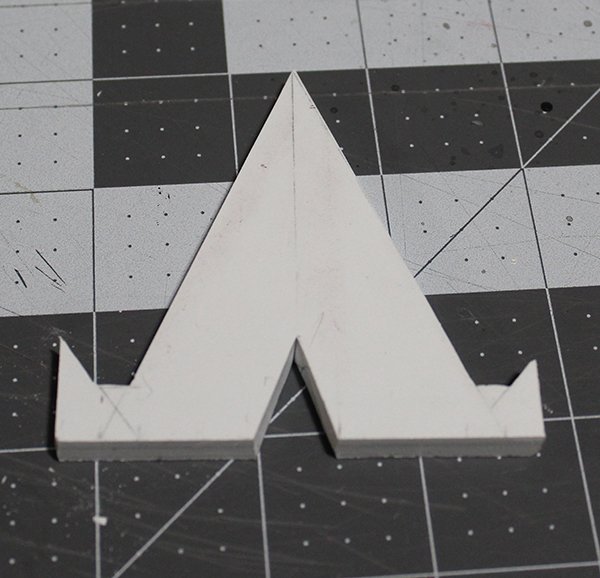
With that idea in mind, I drew the symbol onto another piece of EPVC and cut it out
I could have stopped here, but I wanted the symbol to have more visual interest than a big Greek letter made of rusted steel. I wanted to clad both sides of the letter in carved stone.
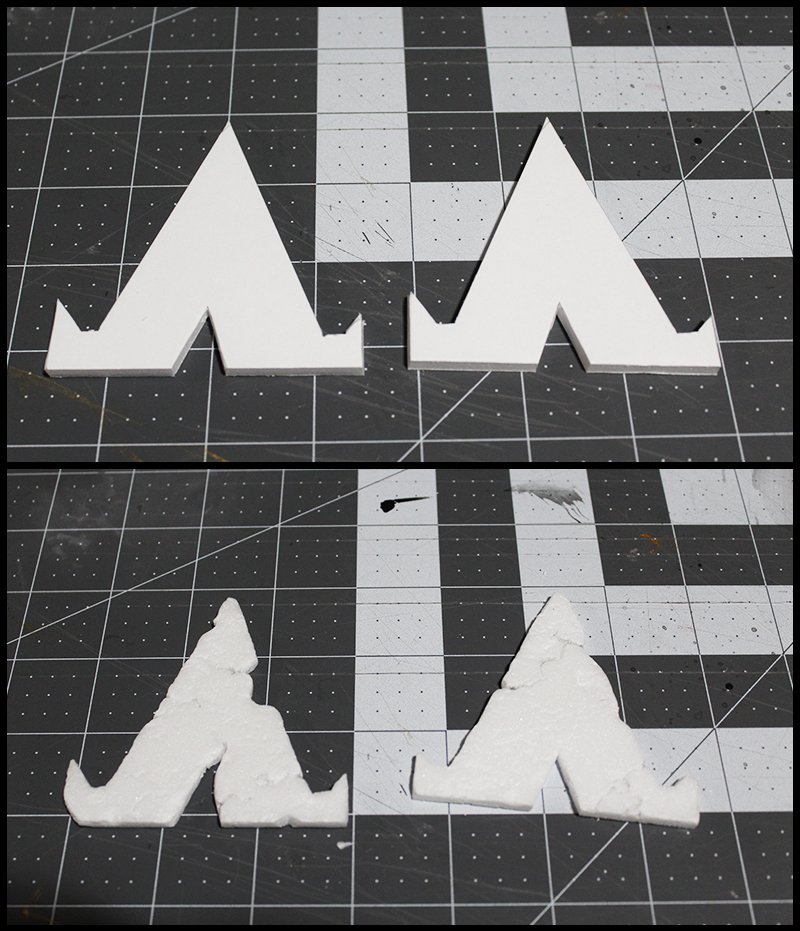
I traced my EPVC form onto some foamcore and cut out two copies. Removing the paper lining from these, I attacked them with a hobby knife, a sharp pencil, and my tinfoil texturing tools. I made sure to take some big chunks out of the edges so that the metal core would be visible under the stone.
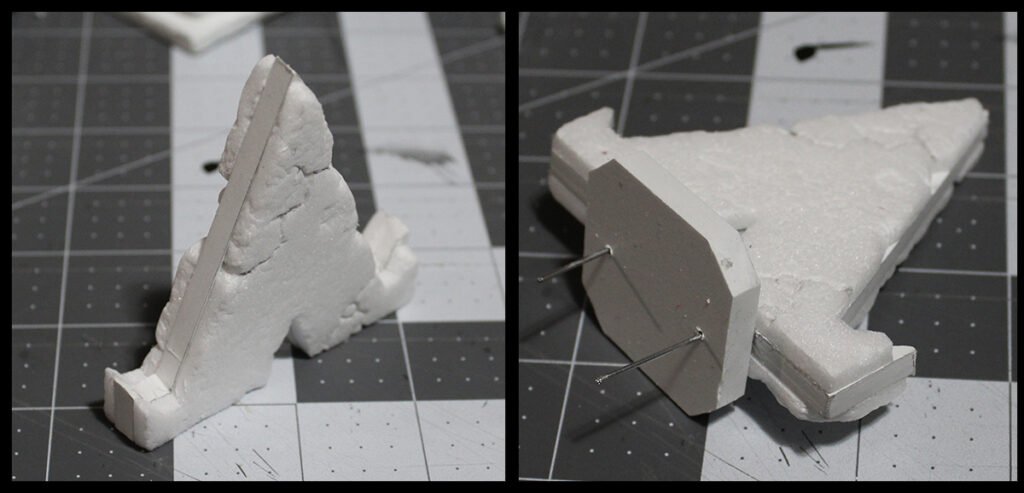
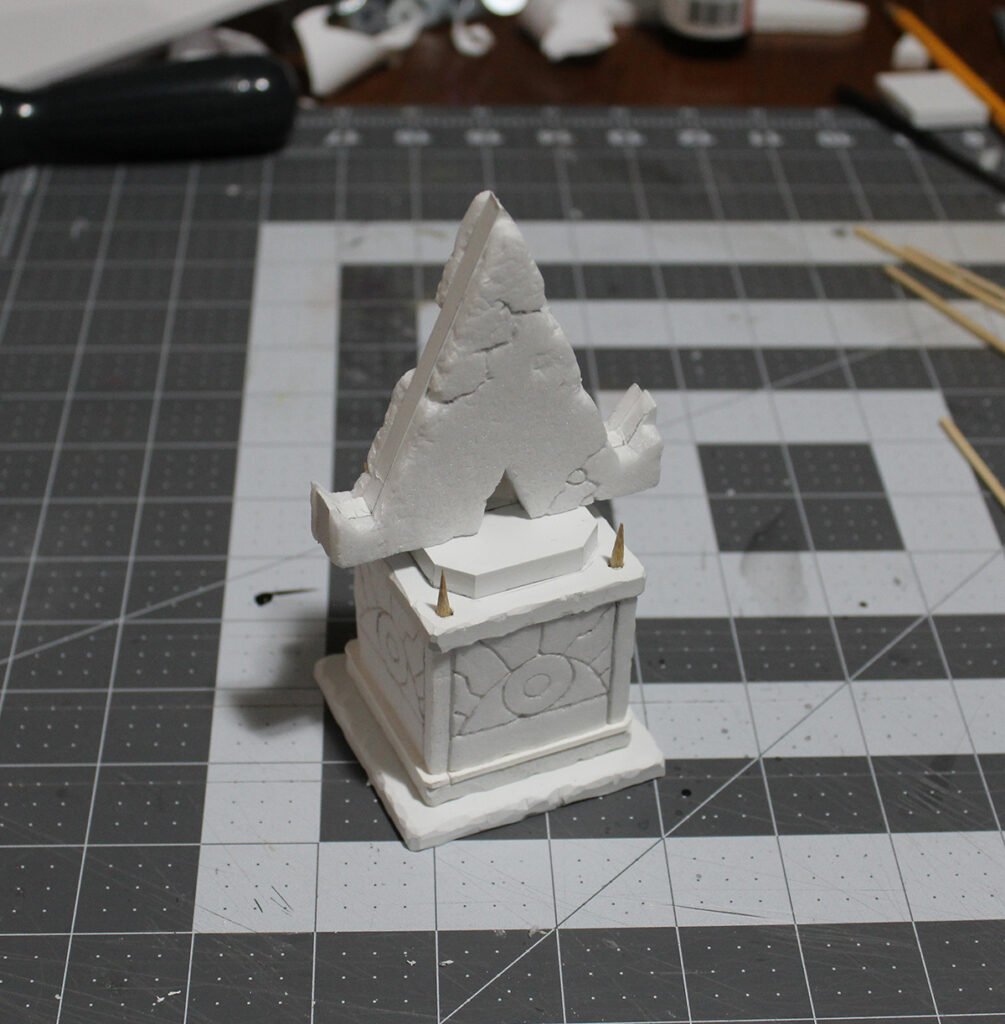
Gluing the foam to my original EPVC piece I now had a solid and imposing symbol of authority to place atop the base. I cut a smaller square of EPVC and mitered the corners. This piece didn’t get carved into to look like stone, as I wanted it to represent a metal base connecting the metal core of the symbol to the base.
Because super glue would melt the foam and there’s such a small contact surface between the EPVC core of the symbol and the piece it rests on, I decided to pin them together. I glued them together normally with super glue, carefully avoiding the foam, then drilled two holes through the bottom. I inserted paperclips into these holes with a dab of superglue on each, then snipped them flush once the glue had dried.
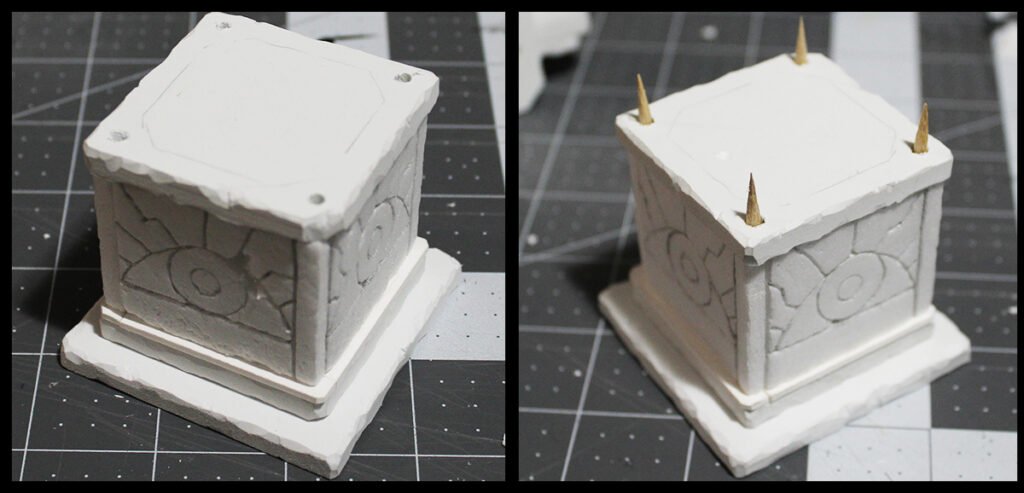
Now that I had my final topper for this cake, I decided I wanted to add a bit more flair. Before gluing them together I traced the footprint of the symbol onto the base with a pencil. This let me visualize exactly what space it would occupy.
In the remaining open area on each corner, I drilled a shallow hole and super glued in the end of a thick barbecue skewer. These were then lightly coated in superglue to strengthen them and prevent fraying of the bamboo fibers.
The nitty gritty was over with: using a heavy and final dose of superglue, I attached the symbol to the base.
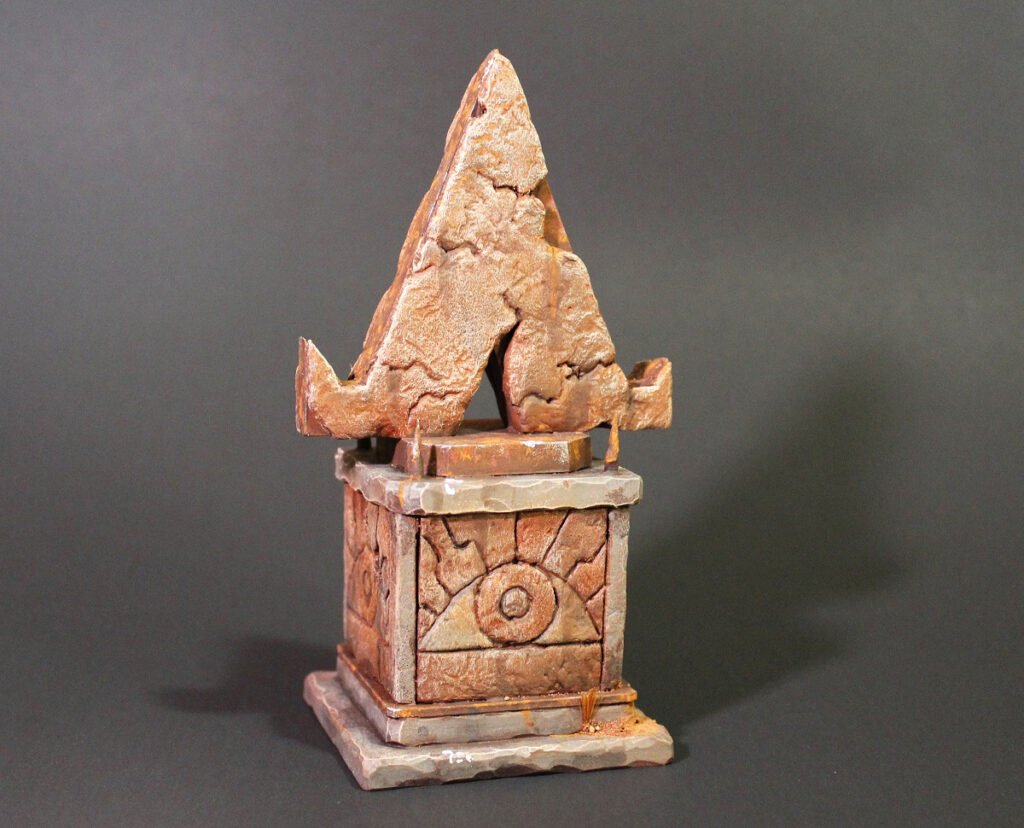
The Final Result
I’m psyched at the result I was able to get building a piece like this in an evening, but it didn’t even have to take that long. If someone didn’t have EPVC at hand, building the whole thing out of insulation foam or foamcore would be just as easy or easier, and a few of the more complicated parts of this could be skipped to get a very similar result.
The game just needs a simple shape that your heretics can scramble around and try to attach posters to, so an obelisk carved out of a single piece of foam would work just as well. I’m excited to see what people who try Heretic out end up using as a monument!